
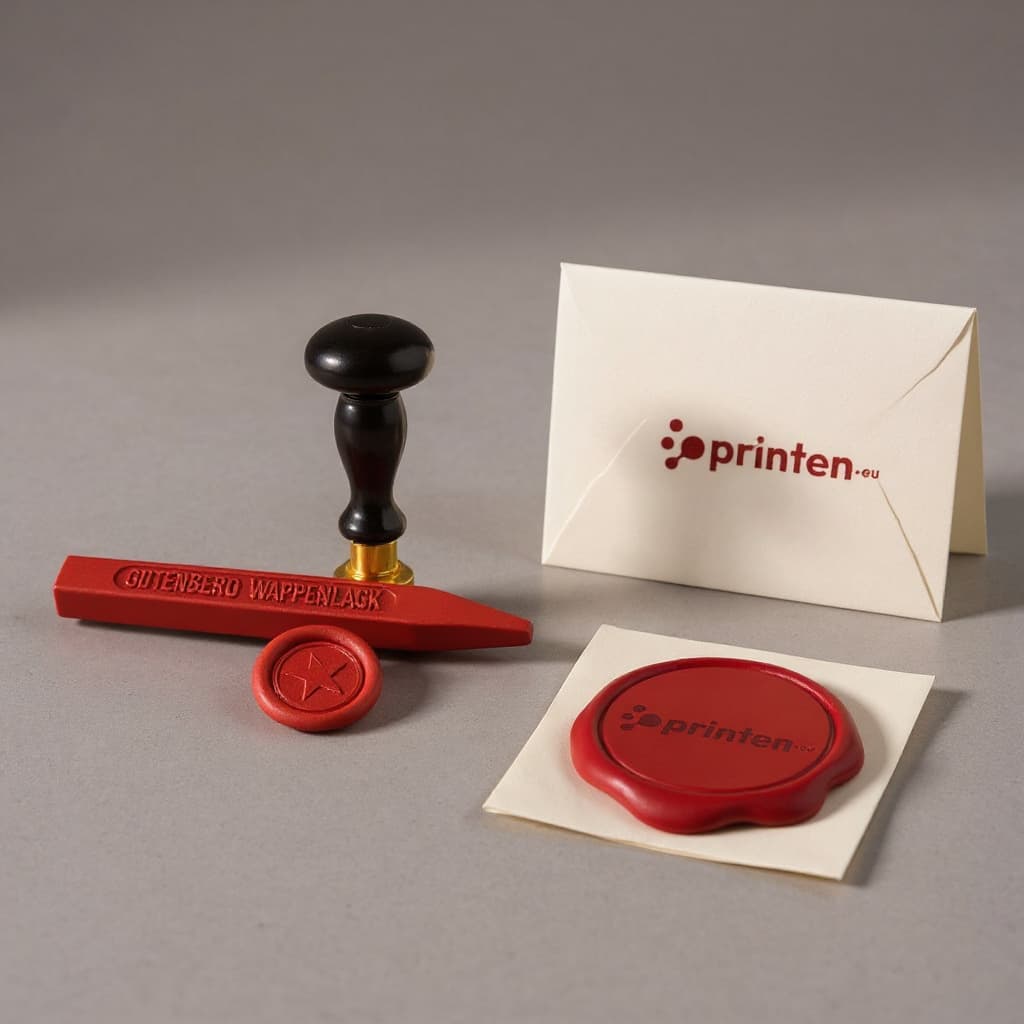
Sealing wax sticks, wax gun and wax seal accessories
Configure to see your price
Choose your options and quantity. Your total will appear here.
Sealing wax in twelve colours, sticks for the electric wax gun, the gun itself, a melting spoon and adhesive dots. Everything for a beautiful wax seal.
Product Configuration
Select all options
Selling yourself? Become a reseller
Everything for a beautiful wax seal
A wax seal stamp turns any envelope, invitation or package into something special. Here you will find everything you need to go with it: sealing wax sticks to melt, sticks for the electric wax gun, the gun itself, a melting spoon and adhesive dots to attach finished seals. It all works with any common wax seal stamp, including one made with your own logo.
Why you will like it
- Twelve colours, from classic red and burgundy to gold, silver, copper, white and black
- Order a single stick or a box of 6
- A mixed box with copper, gold and silver for a festive look
- The wax gun melts the wax evenly, ideal for large batches such as wedding stationery
- The adhesive dots fix a seal to paper, card, ribbon or gift wrap
Which item should you choose?
A single stick or a box of 6 is melted over a candle or in the melting spoon. That is the traditional way and perfect for a handful of seals. Making dozens or hundreds? Then go for the electric wax gun with the wick sticks made for the gun: quicker, cleaner and every seal about the same size. Use the melting spoon over a tea light, which also lets you use up leftovers and mix colours. For the gun, the spoon and the adhesive dots, choose "Not applicable" as the colour.
How to make a beautiful wax seal
- Have your stamp ready and work on a flat, heat resistant surface.
- Melt the wax over a flame, in the melting spoon or with the wax gun.
- Pour or drip a round pool of wax slightly larger than your stamp.
- Wait a few seconds until the wax is no longer completely liquid.
- Press the stamp straight down and hold it still for a moment.
- Lift the stamp gently and straight up once the wax has set.
Handy tips
If the wax sticks to your stamp, let the stamp cool on a cold surface first. You can also make your seals in advance on baking paper and attach them later with the adhesive dots exactly where you want them. Never leave a burning candle or a hot wax gun unattended, and keep children at a safe distance.
Delivery
Your order arrives within 1 to 3 working days. You pay the normal shipping cost for your country.
Technical specifications
Related products



Newsletter
10% off your first order
Sign up for printing tips and inspiration. Your discount code will appear after you sign up.